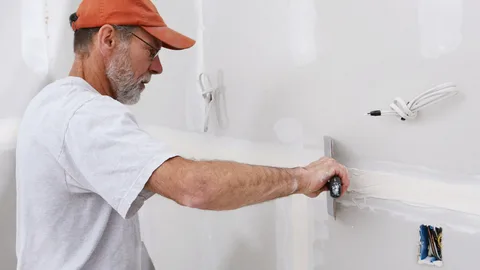
Drywall damage is an inevitable part of homeownership. Whether it’s a result of accidental bumps, water leaks, or simply the wear and tear of everyday life, at some point, you’ll likely find yourself in need of drywall repair. While the prospect of fixing damaged drywall might seem daunting, it doesn’t have to be a drain on your finances. This article will guide you through budget-friendly drywall repair, offering tips and tricks for cost-effective fixes that don’t compromise on quality.
Understanding Drywall Damage
Before delving into the repair process, it’s crucial to understand the types of damage your drywall may encounter. Common issues include:
- Holes and Dents: Small holes and dents can be caused by furniture impacts, doorknobs, or accidental hits.
- Cracks: Settlement cracks or temperature-related expansion and contraction can result in visible cracks on your drywall.
- Water Damage: Leaks or flooding can lead to water-damaged drywall, characterized by stains, soft spots, and swelling.
- Nail Pops: Over time, the screws or nails securing the drywall to the studs may loosen, causing visible bulges or pops.
Understanding the nature of the damage will help you choose the most appropriate and cost-effective repair method.
Essential Tools and Materials
Before embarking on any drywall repair project, gather the necessary tools and materials. Investing in quality tools will save you money in the long run and ensure a smoother repair process. Here’s a basic list:
- Putty Knife: Essential for applying joint compound and smoothing surfaces.
- Sanding Block: Used to smooth out patched areas for a seamless finish.
- Mesh Tape: Ideal for reinforcing joints and preventing cracks from reappearing.
- Joint Compound: A versatile material for filling holes, cracks, and seams.
- Drywall Screws: Necessary for securing loose drywall and preventing nail pops.
- Sandpaper: Various grits for sanding joint compound and achieving a smooth finish.
- Primer and Paint: Ensure color consistency and a polished final look.
Cost-Effective Repair Techniques
Now that you have your tools ready, let’s explore some budget-friendly repair techniques for common drywall issues.
Hole and Dent Repair
Patching: For small holes and dents, consider using patch kits available at hardware stores. These often include self-adhesive mesh and joint compound. Apply the patch, cover it with joint compound, and sand for a smooth finish.
Toothpaste Trick: For tiny holes, a creative and budget-friendly solution involves using toothpaste as a quick filler. Once dried, sand it down for a smooth surface before painting.
Crack Repair
Mesh Tape Method: For cracks, apply mesh tape over the affected area before covering it with joint compound. This reinforces the repair and minimizes the chances of the crack reappearing.
Elastomeric Caulk: For cracks in corners or where the wall meets the ceiling, elastomeric caulk is a flexible and affordable solution. It accommodates the natural movement of the structure without cracking.
Water Damage Repair
Cut and Replace: For localized water damage, consider cutting out the damaged section and replacing it with new drywall. This approach prevents the spread of mold and ensures a structurally sound repair.
Bleach Solution: Before repairing water stains, treat the affected area with a bleach solution to prevent mold growth. Once dry, apply a stain-blocking primer before painting.
Nail Pop Fix
Screw Reinforcement: If you encounter nail pops, replace the offending nails with screws. Screws provide better holding power and are less likely to pop out over time.
Apply Joint Compound: After securing the drywall with screws, apply joint compound over the area and sand it down for a seamless finish.
Efficient Repair Process
To make your drywall repair project more efficient and cost-effective, follow these general steps:
- Prepare the Surface: Clean the damaged area, removing any loose debris or old joint compound. Ensure the surface is dry and free of dust before starting the repair.
- Apply Primer: Before painting, apply a coat of primer to ensure better adhesion and color consistency. Primer also helps seal the repaired areas and promotes a professional finish.
- Choose the Right Paint: Invest in high-quality paint to ensure durability. While it may seem cost-effective to opt for cheaper paint, higher-quality options often require fewer coats and offer better coverage, ultimately saving you time and money.
- DIY vs. Professional Help: Assess the complexity of the repair. While many drywall fixes can be done as DIY projects, complex or extensive damage may require professional intervention. Getting a few quotes from local contractors can help you make an informed decision based on your budget and the scope of the project.
Maintenance Tips for Long-Term Savings
Once your drywall is repaired, adopting proactive maintenance practices can extend the life of your walls and save you money in the long run:
- Monitor for Leaks: Regularly check for plumbing leaks or roof issues that could lead to water damage. Addressing these problems promptly can prevent costly repairs down the line.
- Control Humidity: Maintain a balanced indoor humidity level to prevent the development of mold and mildew, which can compromise drywall integrity.
- Furniture Placement: Arrange furniture to avoid constant contact with walls, reducing the risk of dents and scratches.
- Invest in Quality Paint: When it’s time to repaint, invest in high-quality, washable paint. This makes it easier to clean and refresh your walls without the need for frequent repainting.
Conclusion
In conclusion, budget-friendly drywall repair is not only achievable but can also be a rewarding DIY project. By understanding the nature of the damage, using cost-effective repair techniques, and adopting proper maintenance practices, you can keep your walls in top condition without breaking the bank. Remember, a little time and effort invested in your drywall today can save you significant costs in the future.